Clerk Authentication Using JWTs with Hasura GraphQL Engine
Introduction
This guide explains how to connect Hasura GraphQL Engine with Clerk, an authentication provider built for the modern web.
Clerk authenticates users, manages session tokens, and provides user management functionality. The Clerk integration with Hasura enables you to authenticate requests to your Hasura GraphQL API using a JSON Web Token (JWT).
Assumptions
This guide assumes the following:
- You have Hasura Cloud account and project already set up.
- You have created a Clerk account.
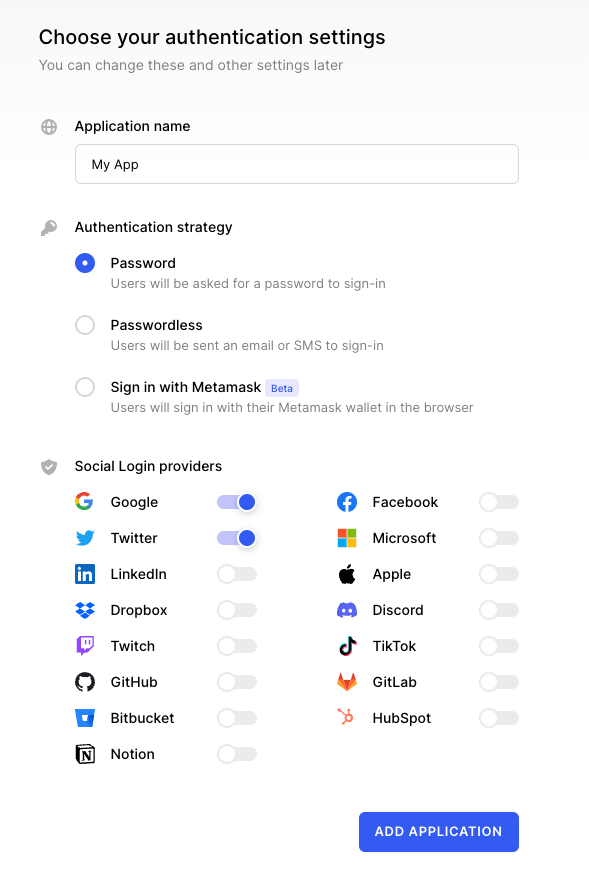
Step 1: Create a Clerk application
Navigate to your Clerk Dashboard and click on the
+ Add applicationbutton.Give your application a name. Then choose whichever authentication strategy and social login providers you prefer. For more information, check out Clerk's application setup guide.
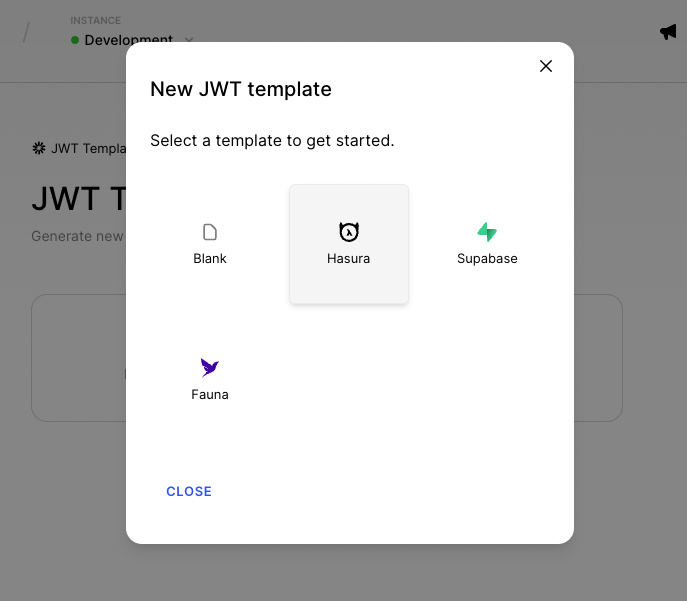
Step 2: Create Hasura JWT template
Once your Clerk application has been created, navigate to JWT Templates. Click the + New template button and
choose the Hasura template.
This will pre-populate the default claims required to authenticate requests to Hasura. You can read more about the necessary claims here.
You can include additional claims or modify them as necessary. Shortcodes are available to make adding dynamic user values easy.
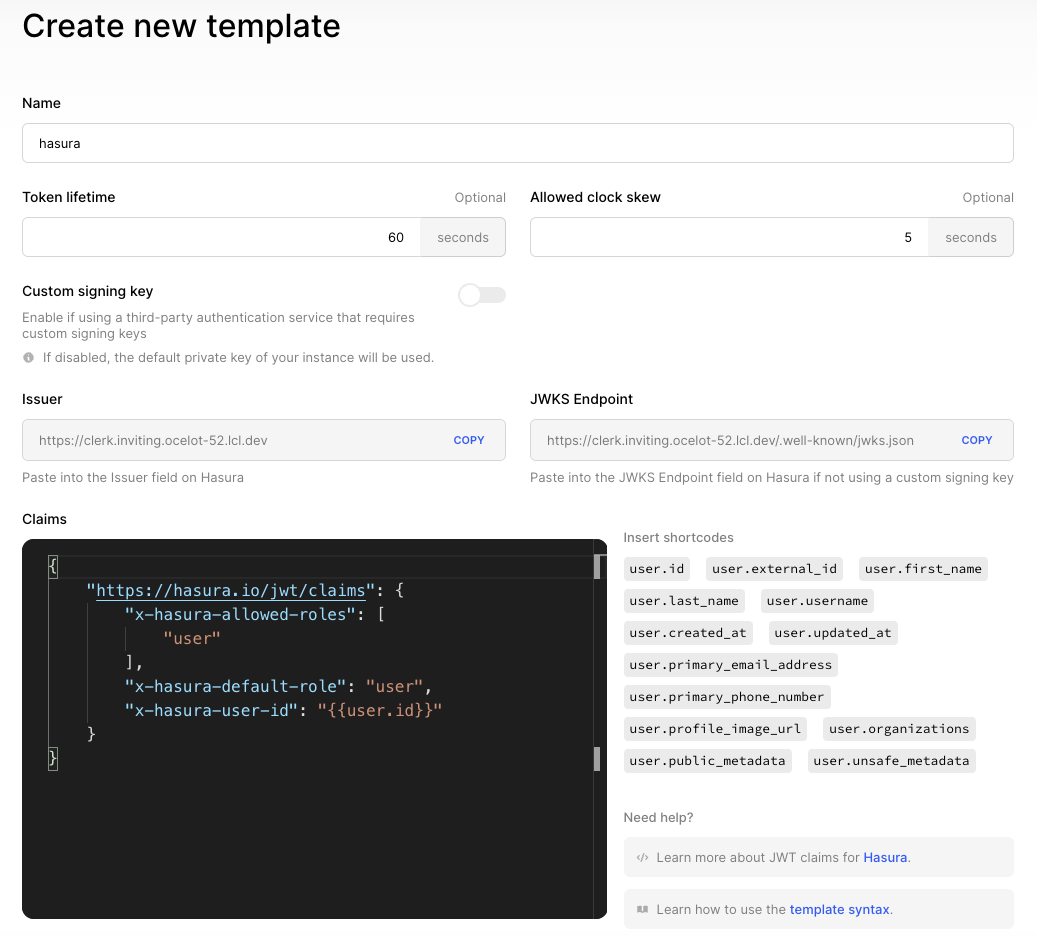
By default, Clerk will sign the JWT with a private key automatically generated for your application, which is what most developers use for Hasura. If you choose this, you can customize this key.
Step 3: Provide JWT key to Hasura
The next step is to provide Hasura with the public key used to verify the JWT issued by Clerk. Assuming you didn't use a custom key, this can be done with the JSON Web Key Set (JWKS), which Clerk automatically creates an endpoint for with your frontend API.
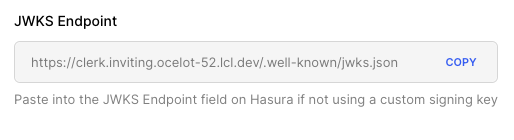
Copy the JWKS endpoint. Go to your Hasura project settings and add a new environment variable. Set the key to
HASURA_GRAPHQL_JWT_SECRET and the value to the following:
{"jwk_url":"https://<YOUR_FRONTEND_API>/.well-known/jwks.json"}
Replace the whole URL with the endpoint you copied or <YOUR_FRONTEND_API> with your frontend API.
If you did use a custom signing key, instead of providing the jwk_url, you need to provide the algorithm type (ex.
HS256) and key as the value of HASURA_GRAPHQL_JWT_SECRET:
{"type": "HS256", "key": "<YOUR_SIGNING_KEY>"}
Step 4: Install the Clerk library
Now it's time to add the Clerk library to your application.
Depending on the frontend library or framework you're using, Clerk has different packages for accessing the Clerk JavaScript SDK. For example, there is a package for Next.js, React, Remix, and more.
Using a Next.js application as an example, run the following:
npm install @clerk/nextjs
Once you have the appropriate package installed, set the following environment variables (typically in a .env.local
file in the project root directory):
NEXT_PUBLIC_HASURA_GRAPHQL_API=<YOUR_HASURA_ENDPOINT>
NEXT_PUBLIC_CLERK_FRONTEND_API=<YOUR_CLERK_FRONTEND_API>
CLERK_API_KEY=<YOUR_CLERK_API_KEY>
The NEXT_PUBLIC_ prefix is specific to Next.js applications, but there are similiar conventions for other frameworks
to pass build-time values to the client.
After the environment variables are set, you can start up your dev server.
The component you want to make authenticated requests from needs to be a child of both <ClerkProvider /> and
<SignedIn />.
In Next.js, update pages/_app.js with the following:
import { ClerkProvider, RedirectToSignIn, SignedIn, SignedOut } from '@clerk/nextjs';

function MyApp({ Component, pageProps }) {
  return (
    <ClerkProvider>
      <>
        <SignedIn>
          <Component {...pageProps} />
        </SignedIn>
        <SignedOut>
          <RedirectToSignIn />
        </SignedOut>
      </>
    </ClerkProvider>
  );
}

export default MyApp;
After signing in, the child routes will now be able to make authenticated GraphQL queries to Hasura.
Step 5: Configure your GraphQL client
GraphQL clients (such as Apollo Client and Relay) can help with querying and caching your data. They can also manage UI state, keep data in sync, and boost performance. That said, you can make a GraphQL request to the Hasura backend with the native browser Fetch API.
The last step of integrating Clerk as the modern web authentication solution for Hasura is to pass the JWT in the
Authorization header of your requests.
You can access the token generated with the Hasura claims by calling getToken({ template: <your-template-name> }) with
the name of your template.
The getToken function is made available with the useAuth() hook or from the Clerk-provided session object.
The getToken({ template: <your-template-name> }) call is asynchronous and returns a promise that needs to be resolved
before accessing the token value.
The token returned is short-lived for better security and should be called before every request to your GraphQL API. The caching and refreshing of the token is handled automatically by Clerk.
Even if you don't have a database table set up yet, the GraphQL built-in introspection system offers a way to validate that authenticated requests are working properly.
Here is an example of using Fetch to make an introspection query in a Next.js application:
import { useAuth } from '@clerk/nextjs';

export default function Home() {
  const { getToken } = useAuth();
  const endpoint = process.env.NEXT_PUBLIC_HASURA_GRAPHQL_API;
  const query = `query { __typename }`;
  const makeQuery = async () => {
    try {
      const response = await fetch(endpoint, {
        method: 'POST',
        headers: {
          'Content-Type': 'application/json',
          Authorization: `Bearer ${await getToken({ template: 'hasura' })}`,
        },
        body: JSON.stringify({ query }),
      });
      const data = await response.json();

      // Do something with your data
      console.log(data);
    } catch (err) {
      // Handle errors
    }
  };

  return (
    <button type='button' onClick={makeQuery}>
      Make query
    </button>
  );
}
Upon clicking the button, a request is made with our Hasura JWT as the Bearer token in the Authorization header. The
response is converted to JSON and logged to the browser console.
If all has been successful, you should see something similiar as below in your browser console:
{
  "data": {
    "__typename": "query_root"
  }
}
Next steps
- Update Hasura access control to define your table permissions
- Replace
fetchwith a GraphQL client like Apollo or graphql-request - Check out the Clerk and Hasura with Next.js starter repo
- Build a cookie clicker app with the Clerk and Hasura tutorial
- Read the Clerk guide for Next.js authentication
- Get support from the Clerk community Discord channel