Using Hasura Cloud with a Google AlloyDB Postgres Database
Introduction
This guide explains how to connect a new or existing Google AlloyDB Postgres database to a Hasura Cloud project. If you're exploring AlloyDB Postgres, check out their docs before continuing below.
Step 1: Sign up or log in to Hasura Cloud
Navigate to Hasura Cloud and sign up or log in.
Step 2: Create a Hasura Cloud project
On the Hasura Cloud dashboard, create a new project:

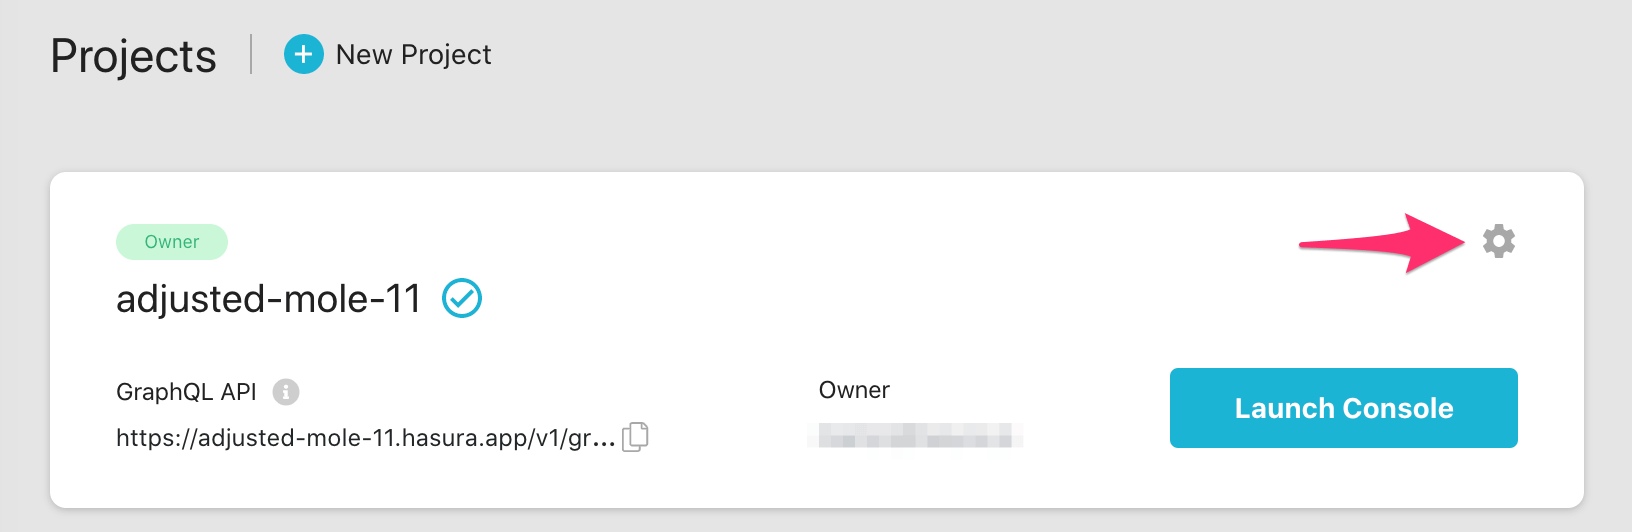
After the project is initialized successfully, click on Launch Console to open the Hasura Console in your browser.
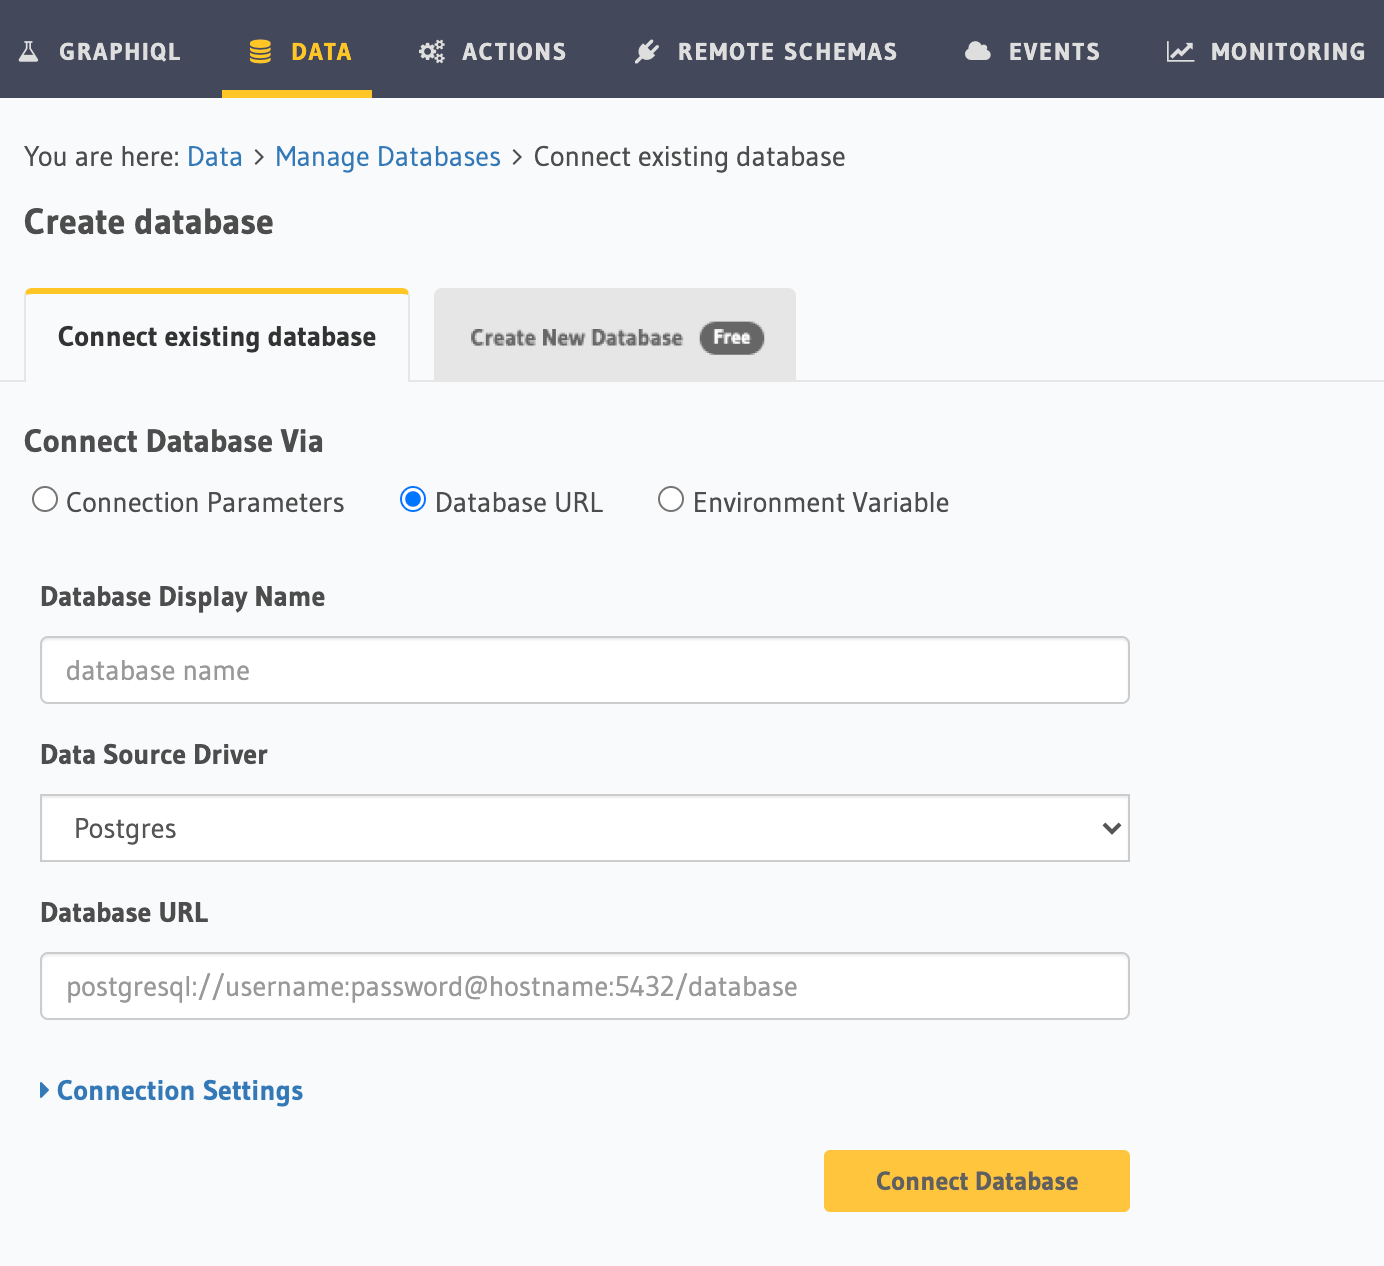
On the Hasura Console, navigate to Data -> Manage -> Connect Database -> Connect existing database:
You will get prompted for a Postgres Database URL. We will create this in the next step and then come back here.
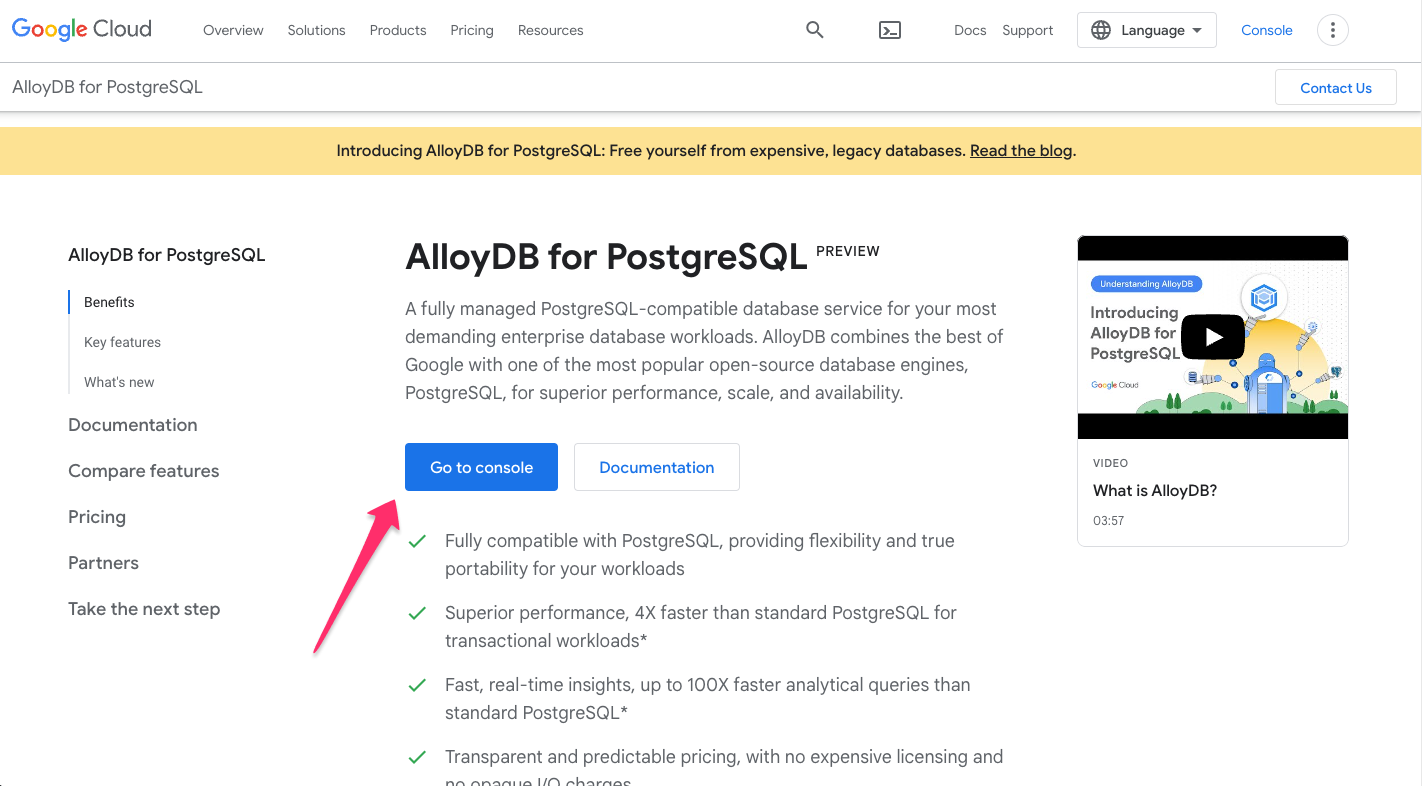
Step 3: Create an AlloyDB database
Head here to learn more about and to try AlloyDB. If logged in, click
Go to console:
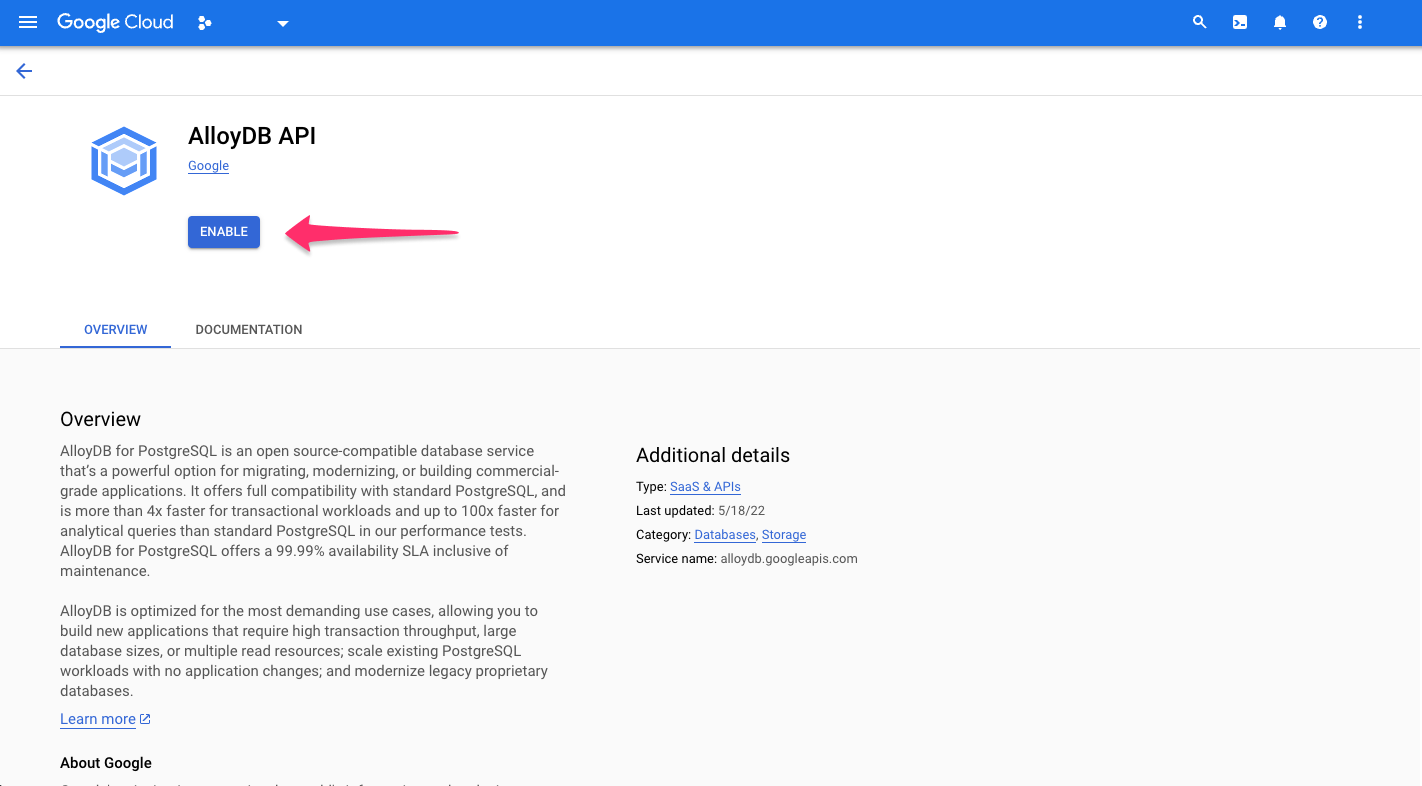
You'll be redirected to GCP where you can get started with AlloyDB by clicking ENABLE:
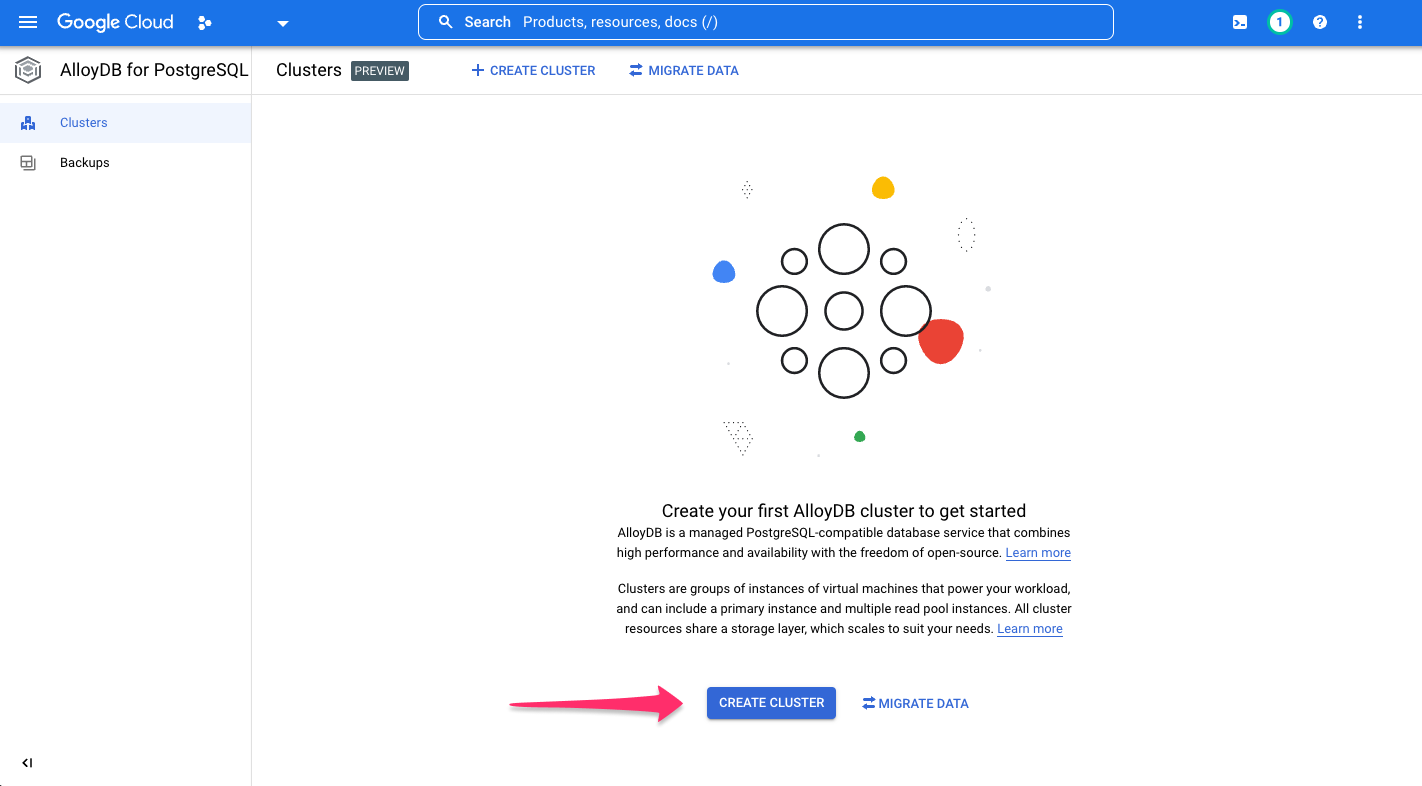
To get started, create a cluster by clicking CREATE CLUSTER:
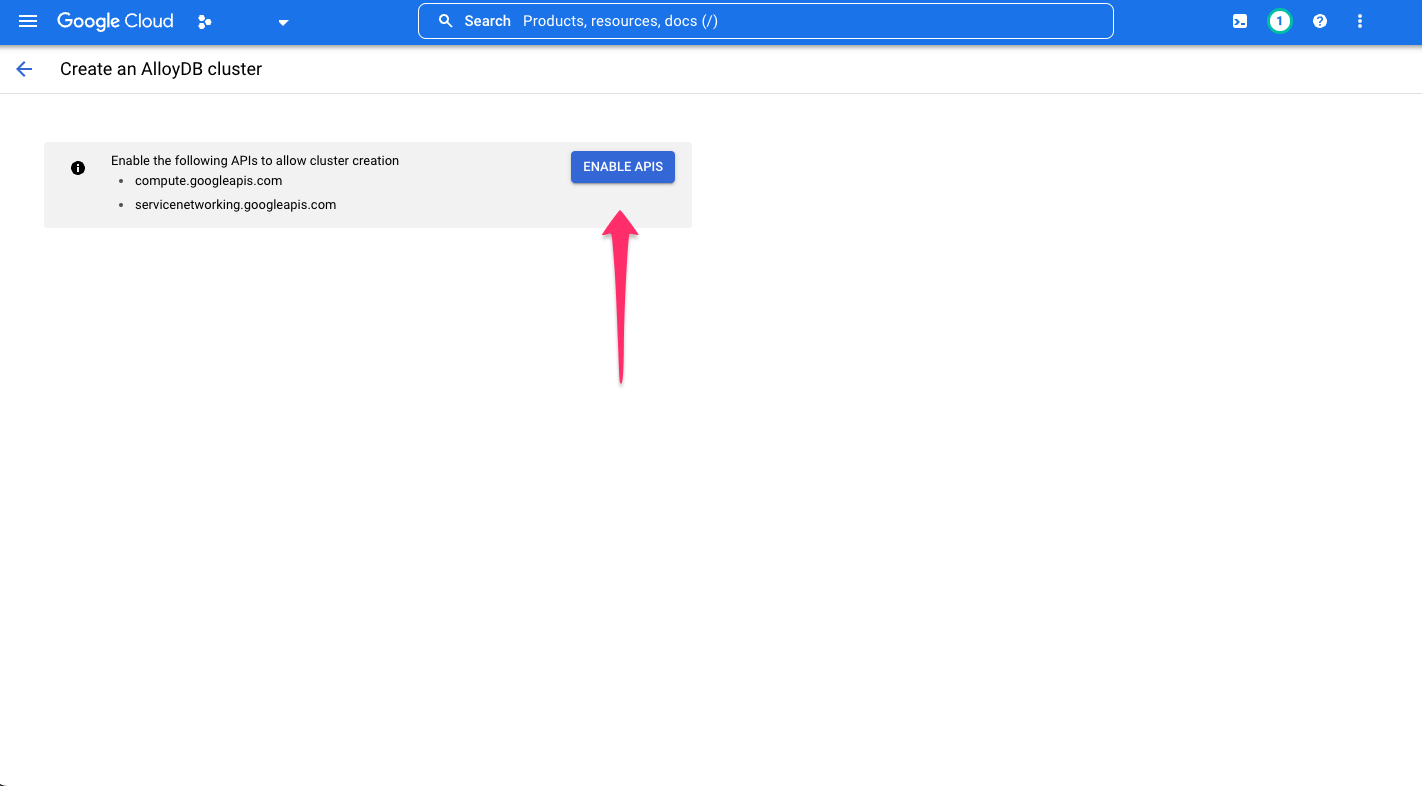
If not already enabled, click, ENABLE APIS:
Choose your cluster type:
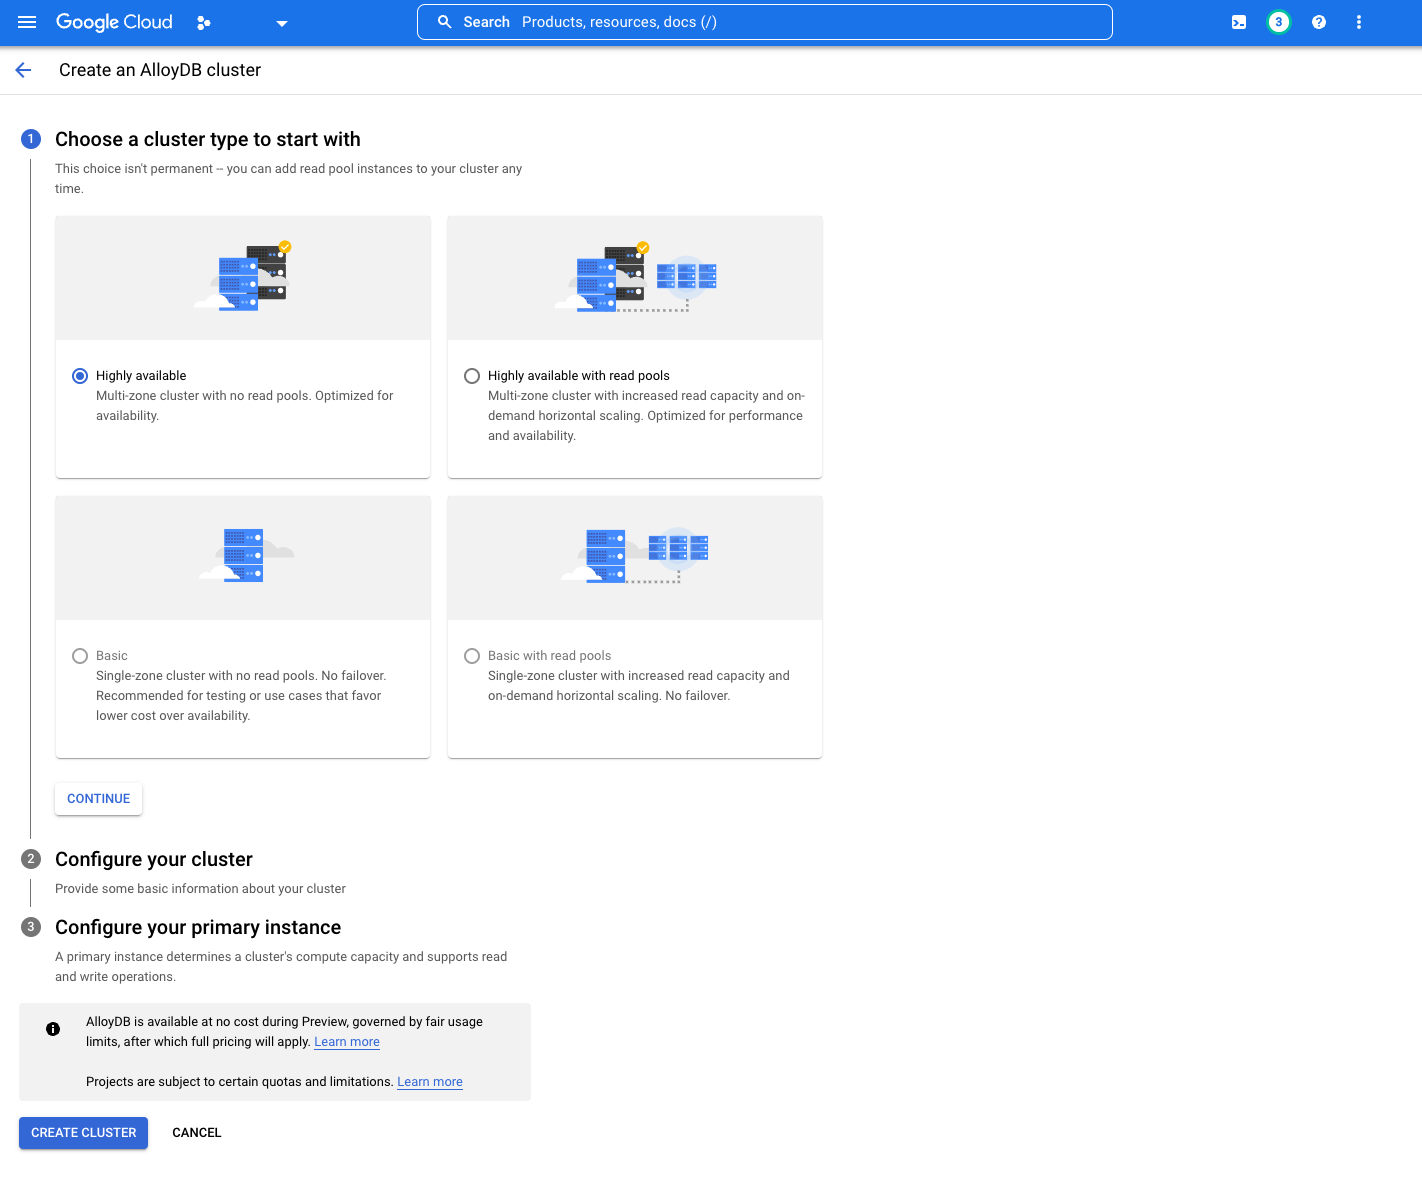
As GCP states, your selection isn't permanent. At the time of writing this document, only two options are available as
the others are currently in development: Highly available and Highly available with read pools.
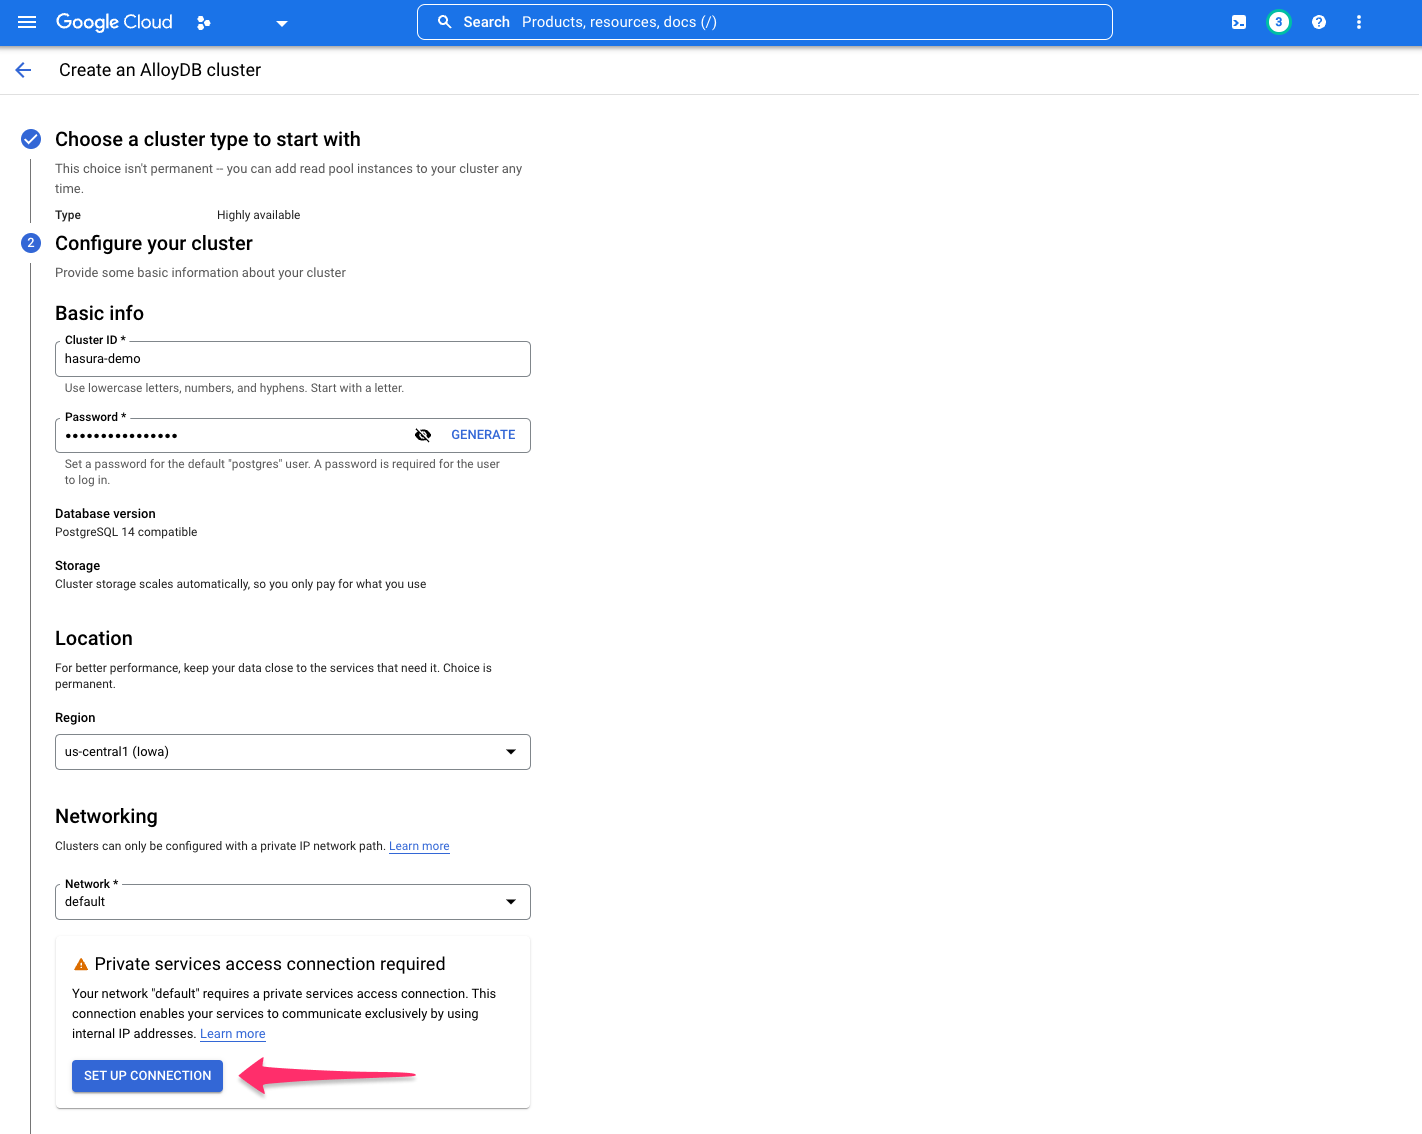
Configure your cluster by providing the information required:

Under the Networking tab, you'll be prompted to set up a list of IP addresses for your services. Click
SET UP CONNECTION:
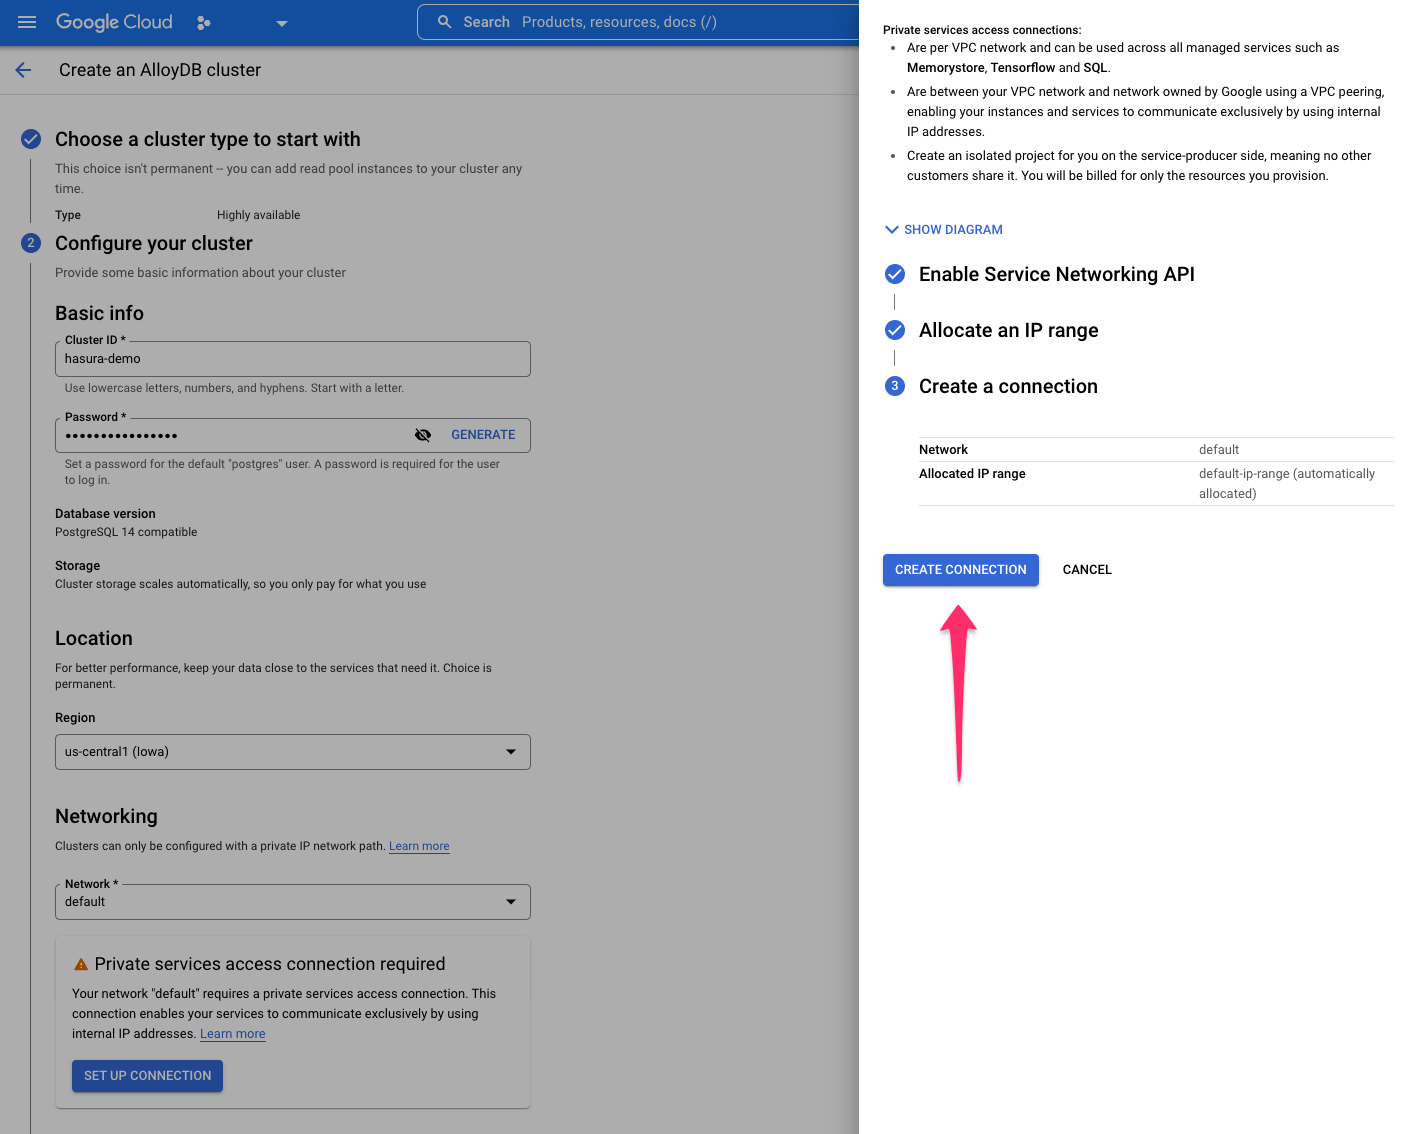
Either select an IP range or let GCP automatically allocate a range. After making your selection, click CONTINUE and
then CREATE CONNECTION:
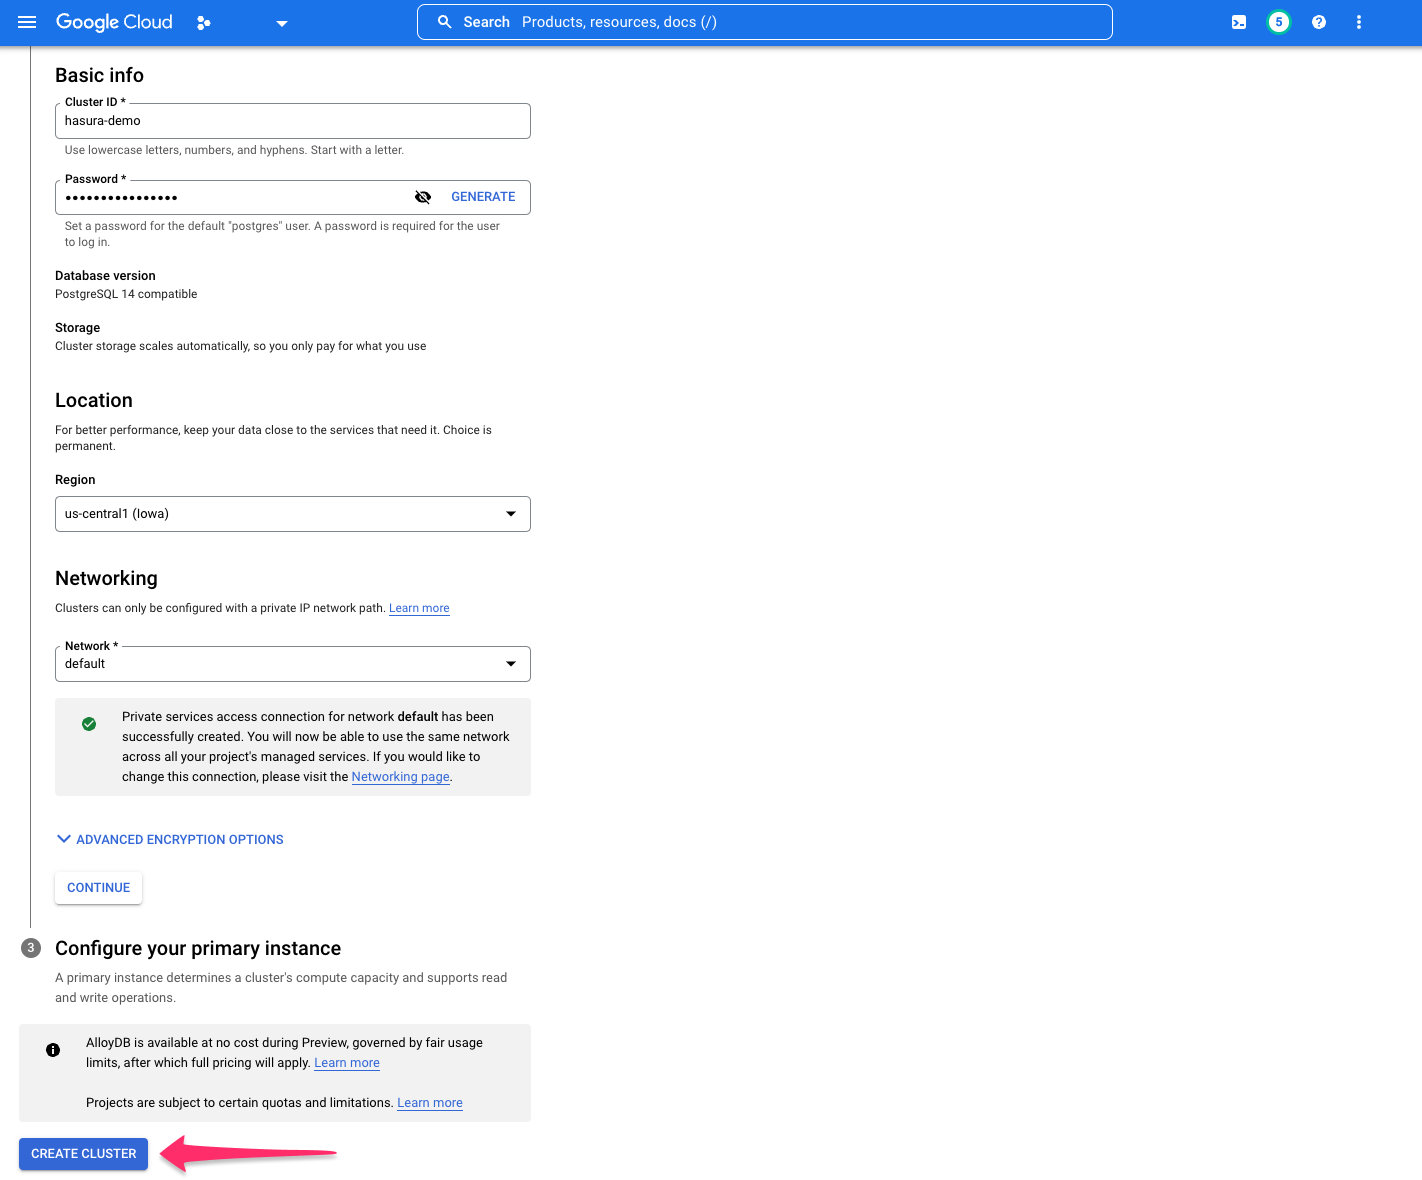
With your cluster configured, you now need to configure your primary instance. Fill in the required information before
clicking CREATE CLUSTER:
Step 4: Create an AlloyDB auth proxy
AlloyDB requires an auth proxy to make authorized, encrypted connections to an instance. You can follow GCP's instructions, found here, to create your auth proxy and generate a connection string to use with Hasura. However, we'll also continue below with a Hasura-specific implementation.
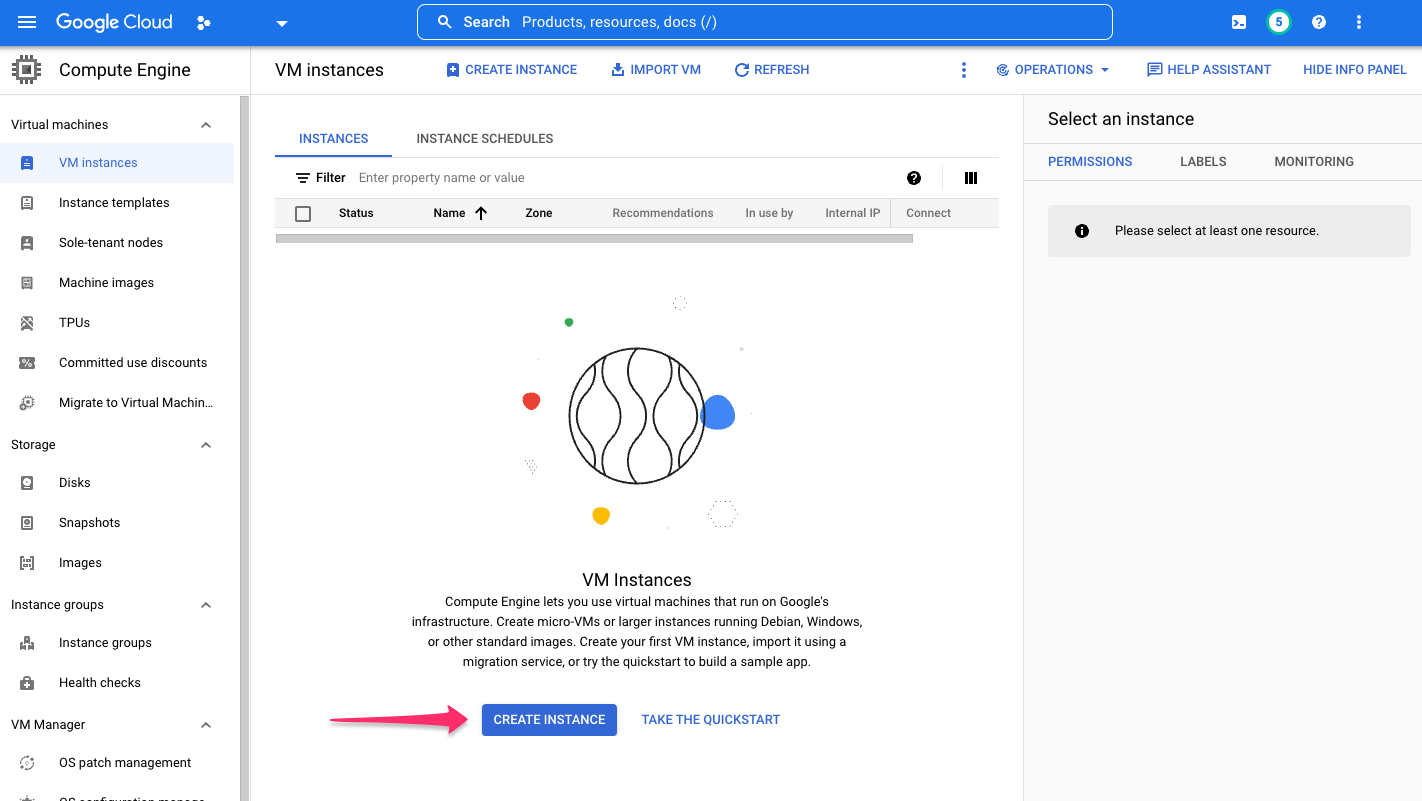
Create a GCE instance
Create a Compute Engine VM that can connect to AlloyDB instances using private services access.
Navigate to the VM Instances page and click CREATE INSTANCE:
Provide a name for this instance and set the following properties:
Access scopes
Set to Allow full access to all Cloud APIs.
Network interfaces
Set to the VPC network configured for private services access to your AlloyDB instance.
TipFor the best performance, select the GCE region as the same or closest to your Hasura Cloud project's region.
Click CREATE.
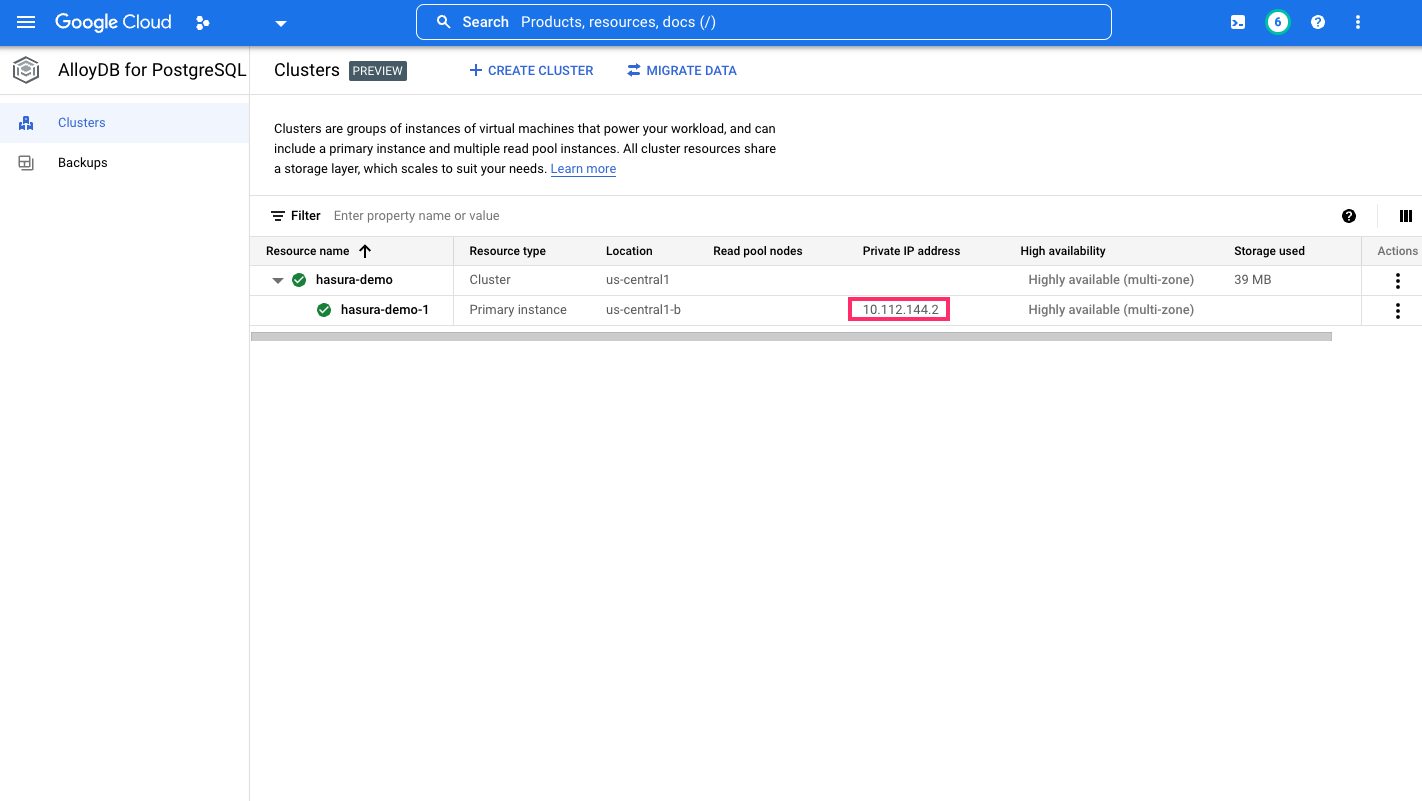
Get the IP address of the AlloyDB instance
From the cluster listing page for your AlloyDB instance, get the private IP address of the instance. You'll use this in the next step to run the auth proxy and connect it to the AlloyDB instance:
From your GCE-created VM instance, download the auth proxy and, per GCP's instructions, make the file executable.
You can start the auth proxy by running this command:
./alloydb-auth-proxy "projects/<project-id>/locations/<region>/clusters/<alloydb-cluster-id>/instances/<alloydb-instance-id>" --address "0.0.0.0"
This starts the auth proxy client and exposes it to the public. Do note that this setup is an ephemeral one. You should run the auth proxy in a permanent mode (for example, via docker detached mode).
Additionally, you may have to specify a different version of the auth proxy, such as alloydb-auth-proxy.linux.amd64.
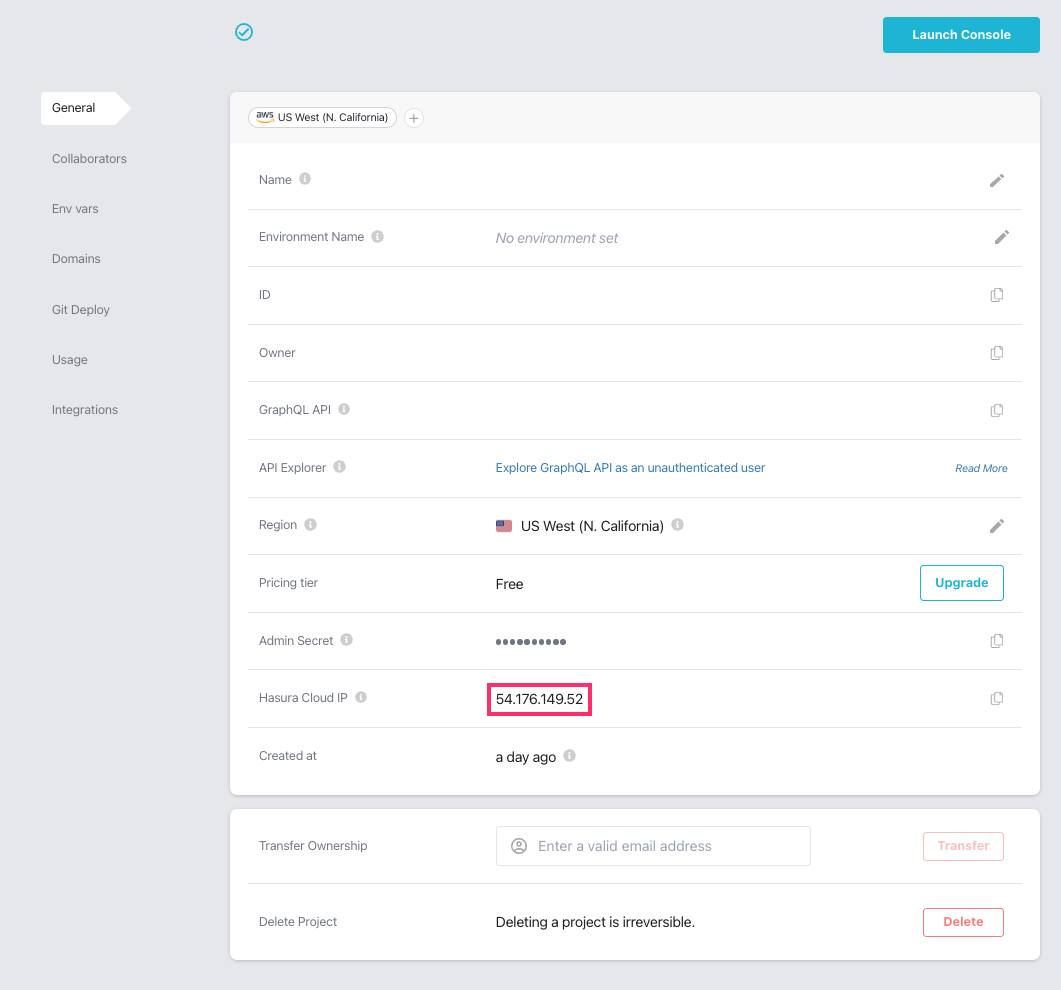
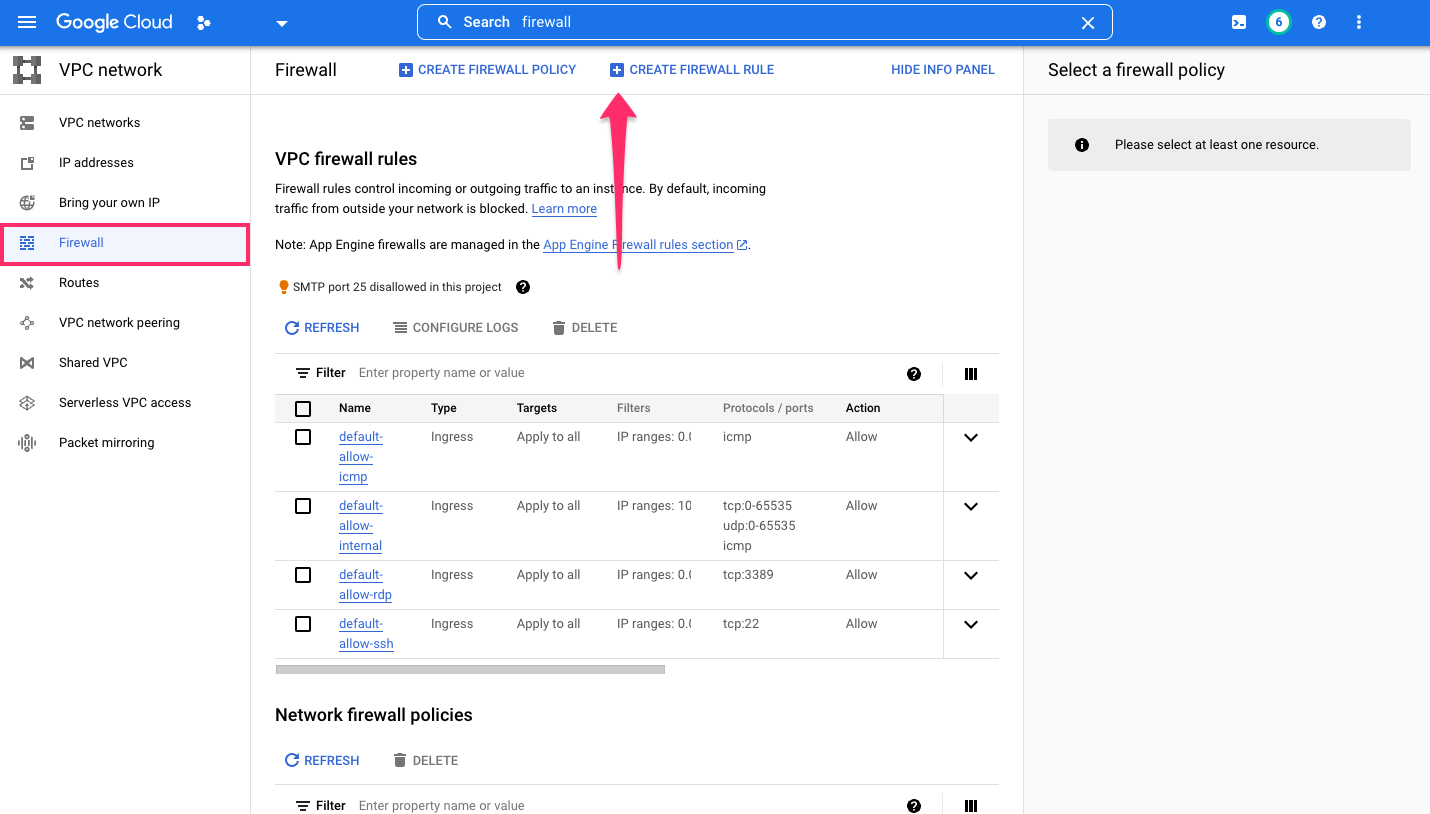
Step 5: Add a firewall rule
With our auth proxy now running, you'll need to create a firewall rule that allows a connection from your Hasura Cloud project. From your project's dashboard, copy the Hasura Cloud IP address:
Within the VPC Firewall settings, add a new rule by clicking, CREATE FIREWALL RULE:
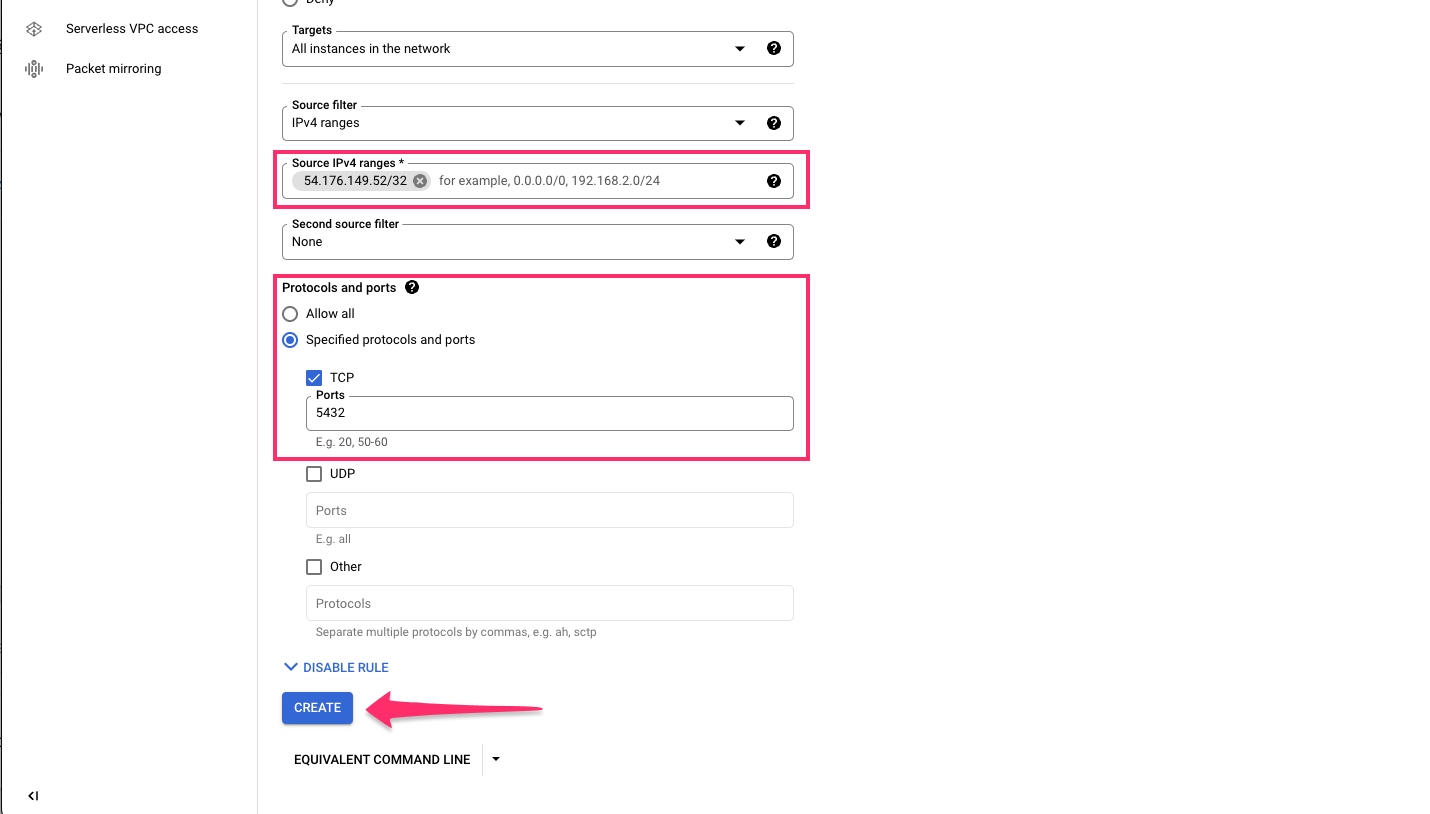
Permit connections to port 5432 and specify the Hasura Cloud IP address in the IPv4 range and click CREATE:
Step 6: Construct the database connection URL and connect the database
The structure of the database connection URL looks as follows:
postgresql://<database-user>:<postgres-password>@<ip-address-of-gce-instance>:5432/<database-name>
- The
database-useranddatabase-nameare bothpostgresby default. - The
postgres-passwordis the password you entered when creating the AlloyDB cluster in step 3. - The
ip-address-of-gce-instanceis from step 4 when you created a GCE VM instance.
Back on Hasura Console, enter the database URL:
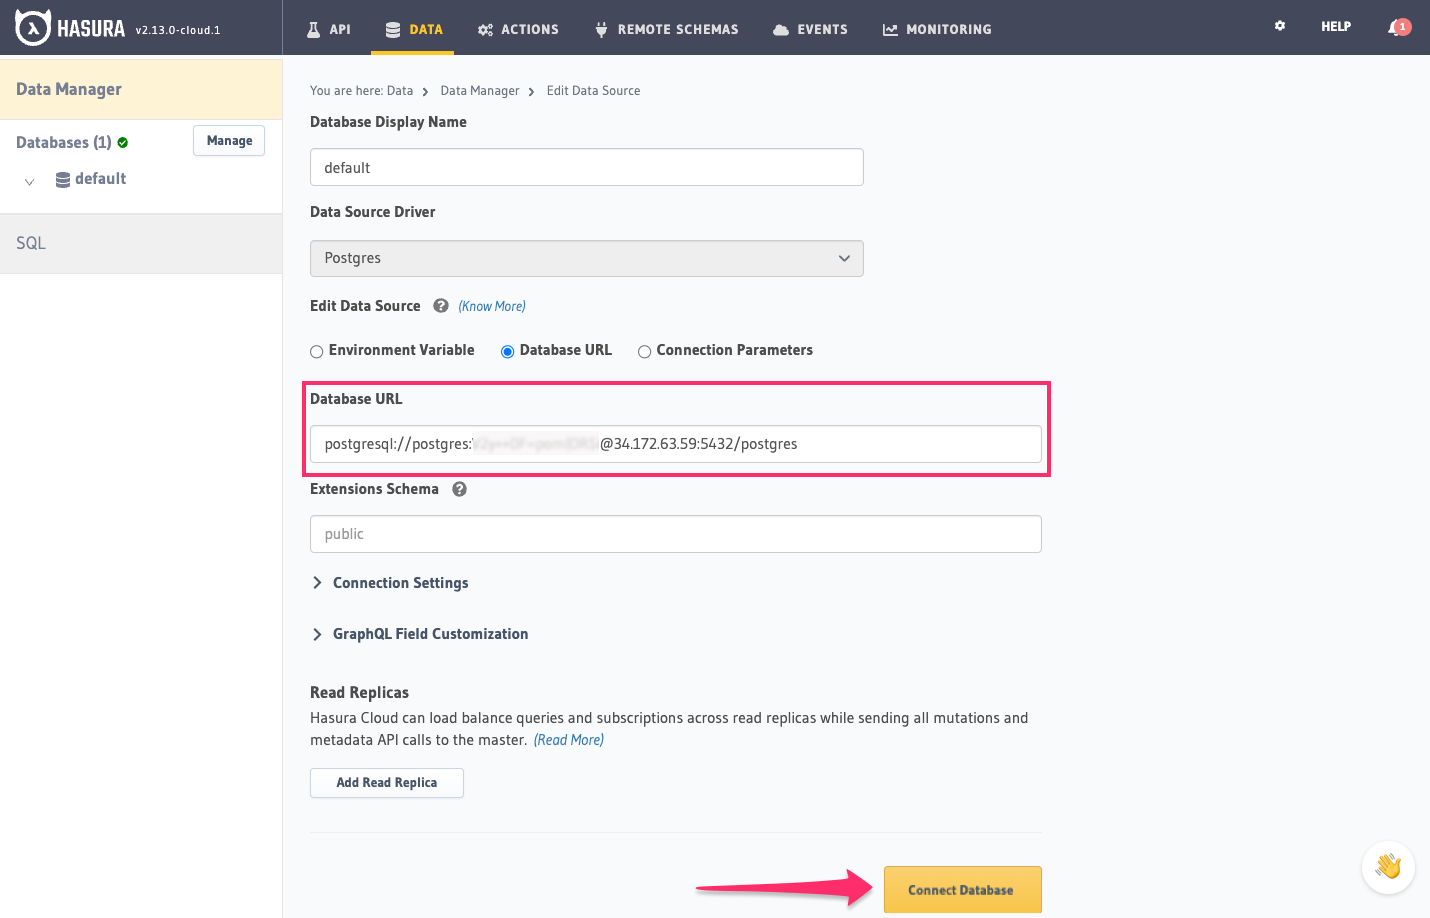
Then click Connect Database.
For security reasons, it is recommended to set database URLs as env vars and using the env vars to connect to the databases in place of the raw database URLs.
Voilà. You are ready to start developing.
Next steps
You can check out our 30-Minute Hasura Basics Course and other GraphQL & Hasura Courses for a more detailed introduction to Hasura.
You can also click the gear icon to manage your Hasura Cloud project. (e.g. add collaborators, env vars or custom domains).
For more information on which Postgres features we support, check out this page!