Creating a Cron Trigger
Introduction
Cron triggers are used to reliably trigger HTTP endpoints to run custom business logic periodically based on a cron schedule. For example, you can create a cron trigger to generate an end-of-day sales report every weekday at 10pm.
To add a cron trigger, follow these steps:
Step 1: Define the cron trigger
The following fields are required to define a cron trigger:
- Name: A name for the cron trigger.
- Webhook: The HTTP endpoint that should be triggered.
- Cron schedule: A cron expression defining the schedule for the cron. Cron events are created based on the UTC timezone. You can use tools like crontab guru to help build a cron expression.
- Payload: The JSON payload which will be sent to the webhook.
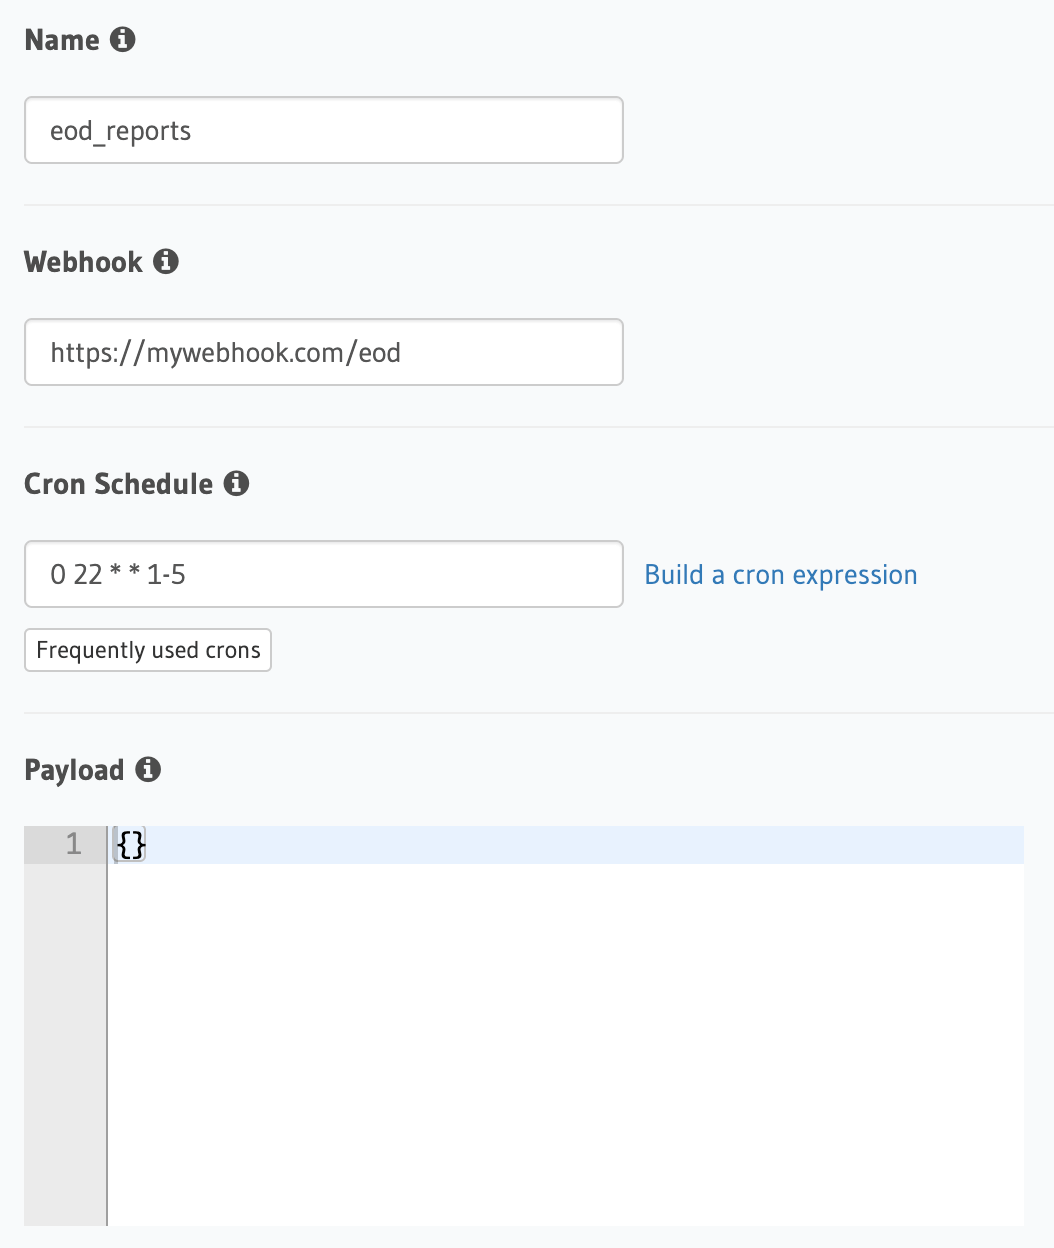
For example, we can create a cron trigger called eod_reports, to trigger the webhook https://mywebhook.com/eod with
the cron schedule 0 22 * * 1-5, which means "At 22:00 on every day-of-week from Monday through Friday" (you can check
this here).
- Console
- CLI
- API
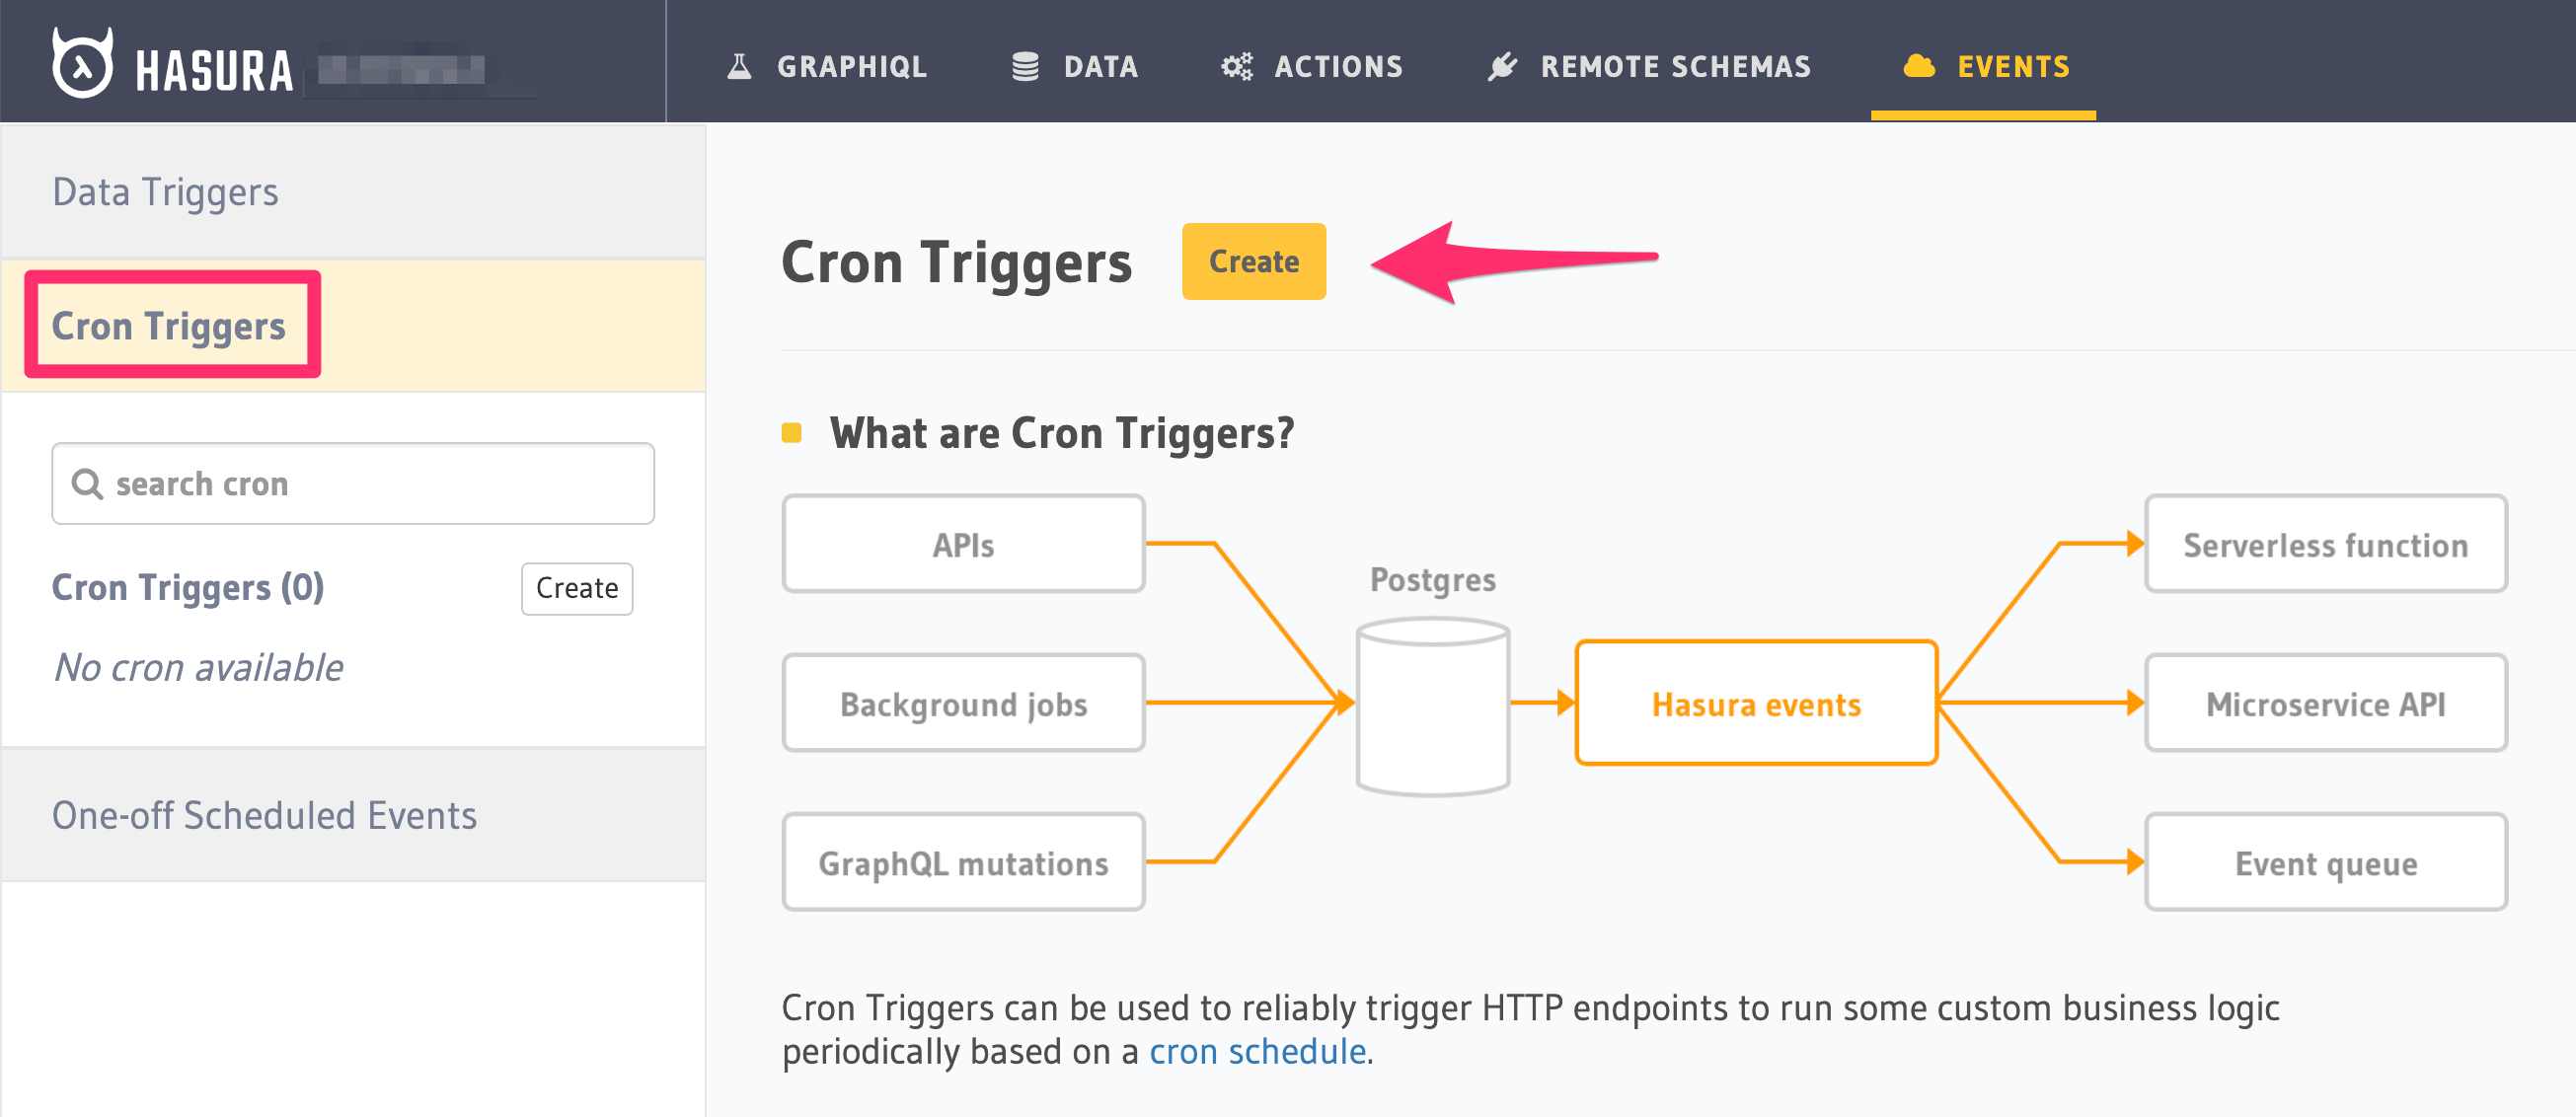
Navigate to Events > Cron Triggers > Create in your Hasura console.

In the form opened, fill out the fields defined above:
You can use the link next to the Cron Schedule field to help build a cron expression using
crontab guru, or use the Frequently used crons dropdown as a shortcut.

You can define a cron trigger by adding it to the cron_triggers.yaml file inside the metadata directory:
- name: eod_reports
  webhook: https://mywebhook.com/eod
  schedule: 0 22 * * 1-5
  include_in_metadata: true
  payload: {}
Apply the metadata by running:
hasura metadata apply
You can define a cron trigger via the create_cron_trigger metadata API:
POST /v1/metadata HTTP/1.1
Content-Type: application/json
X-Hasura-Role: admin

{
   "type": "create_cron_trigger",
   "args": {
      "name": "eod_reports",
      "webhook": "https://mywebhook.com/eod",
      "schedule": "0 22 * * 1-5",
      "payload": {},
      "include_in_metadata": true
   }
}
Step 2: Define advanced options (Optional)
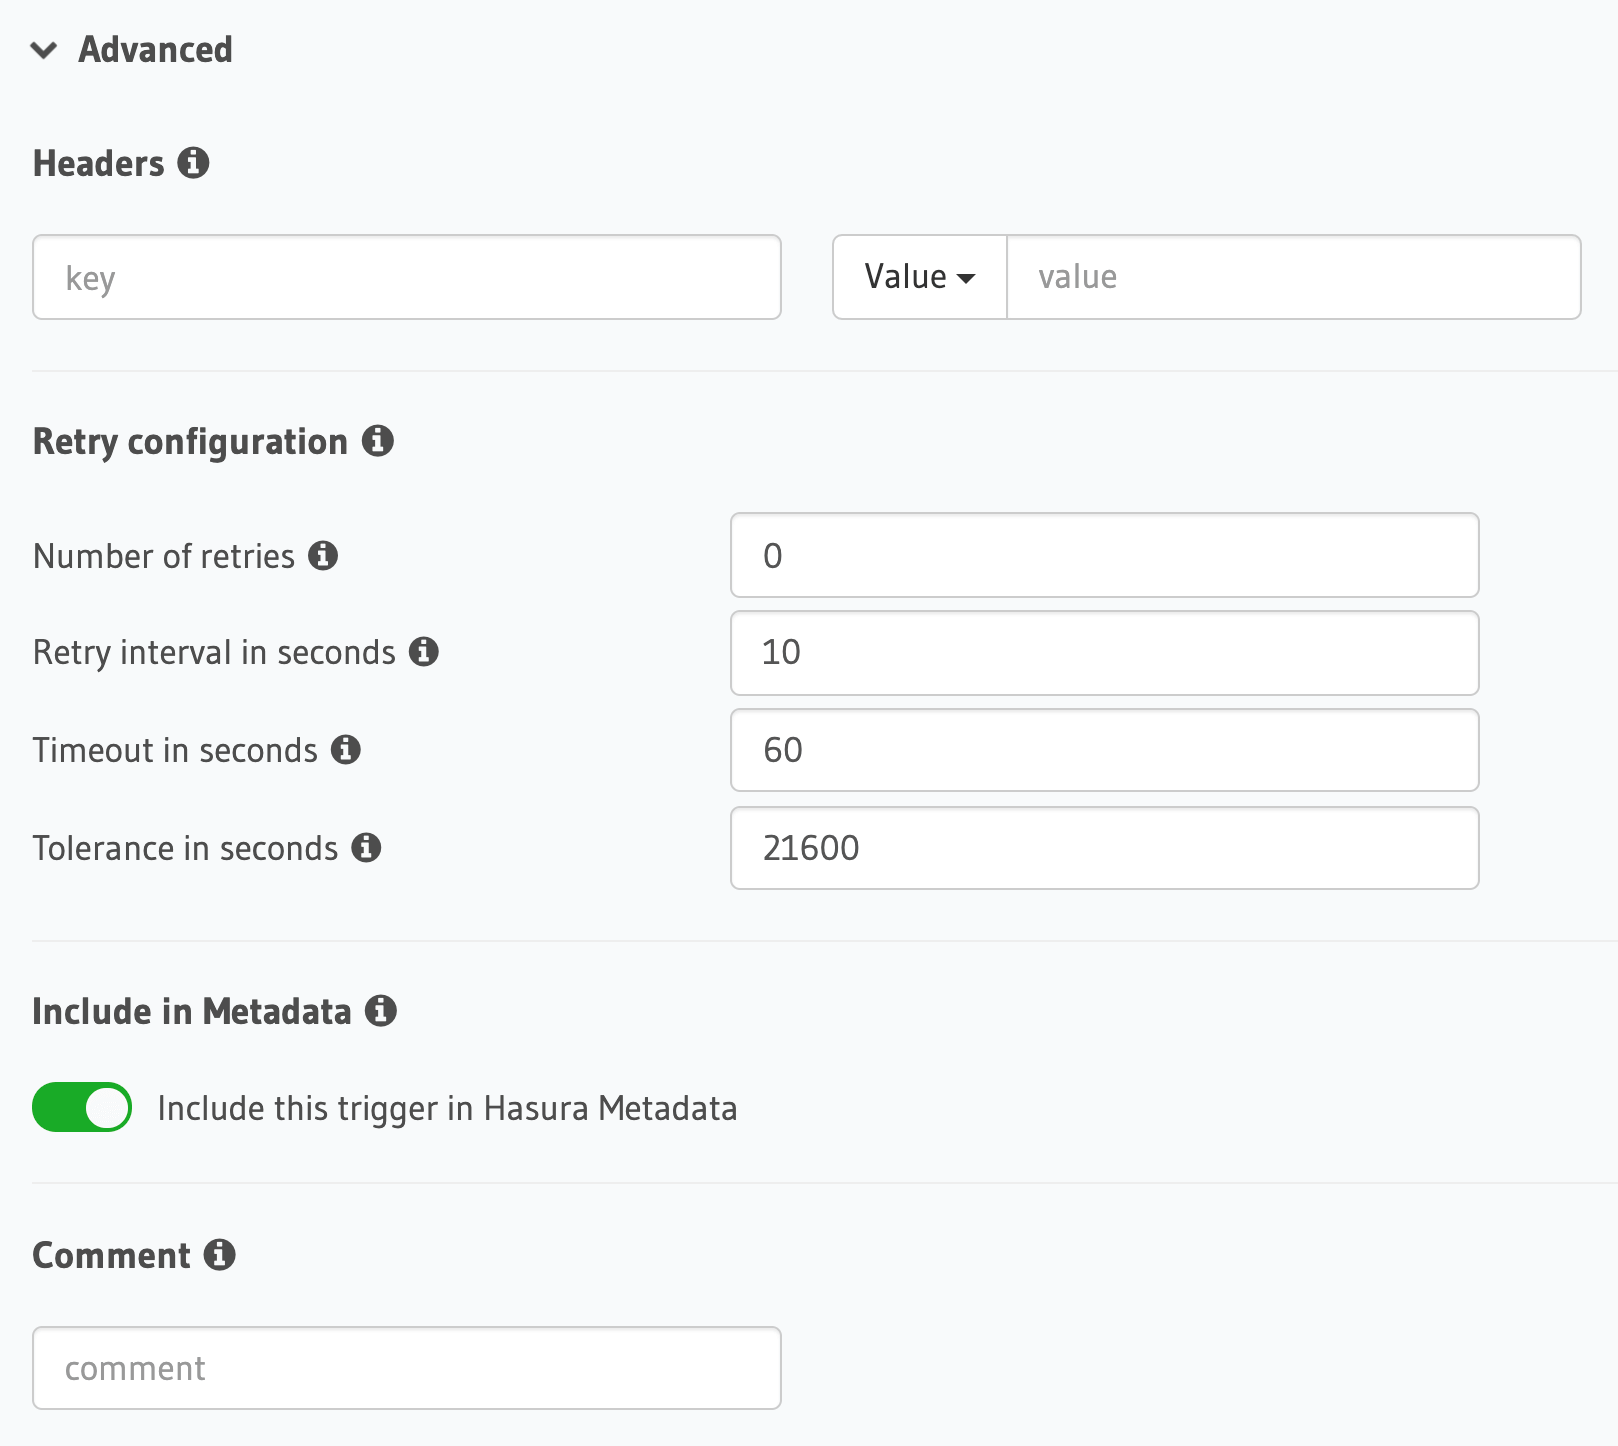
If you like, you can also define the following values:
- Headers: List of headers to be sent to the webhook.
- Retry configuration: In case the call to the webhook fails.
- Include in metadata: When set to true, the cron trigger will be included in the metadata and can be exported along with it.
- Comment: Custom description of the cron trigger.
- Console
- CLI
- API
Expand the Advanced section.

You can define advanced options for a crone trigger when adding it to the cron_triggers.yaml file inside the
metadata directory:
- name: eod_reports
  webhook: https://mywebhook.com/eod
  schedule: 0 22 * * 1-5
  include_in_metadata: true
  payload: {}
  retry_conf:
    num_retries: 3
    timeout_seconds: 120
    tolerance_seconds: 21675
    retry_interval_seconds: 12
  comment: This is a comment
Apply the metadata by running:
hasura metadata apply
You can define advanced options for a cron trigger when defining it via the create_cron_trigger metadata API:
POST /v1/metadata HTTP/1.1
Content-Type: application/json
X-Hasura-Role: admin

{
   "type": "create_cron_trigger",
   "args": {
      "name": "eod_reports",
      "webhook": "https://mywebhook.com/eod",
      "schedule": "0 22 * * 1-5",
      "include_in_metadata": true,
      "payload": {},
      "retry_conf": {
            "num_retries": 3,
            "timeout_seconds": 120,
            "tolerance_seconds": 21675,
            "retry_interval_seconds": 12
      },
      "comment": "sample_cron commment"
   }
}
Schedule & logs
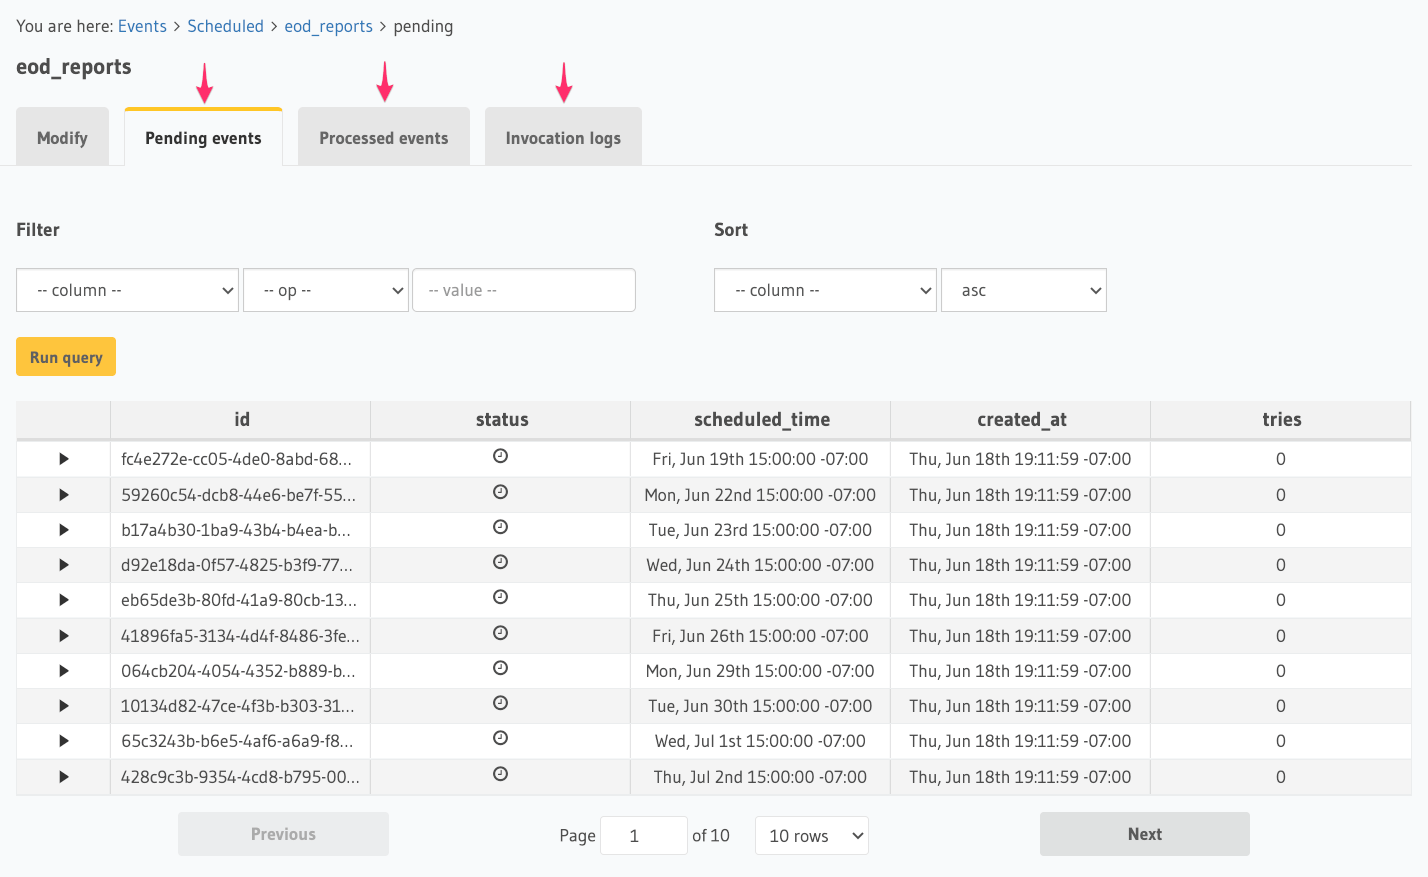
Once you've created your cron trigger, you can see Pending events, Processed events, and Invocation logs in their
respective tabs.

Rest Connectors
REST Connectors i.e. request and response transformations, for cron triggers are used to invoke existing or third-party webhooks without needing any middleware or modifications to the upstream code.
REST Connectors modify the cron trigger's HTTP request to adapt to your webhook's expected format by adding suitable transforms.
Currently, rest connectors for cron triggers can only be configured through the CLI and the metadata API.

